来源:网络 作者:佚名
本人经过不断的摸索,终于找到一种更精细更完美的通道抠发丝方法。
思路:有点类似中性灰磨皮,我们选择好发丝与背景色差最大的通道,并复制到图层面板;然后创建一个曲线调整图层,把暗部提亮,这样我们可以看到更多的发丝细节;在复制的通道我们用调色工具,加深工具,钢笔工具等灵活把发丝都完整细化出来;再把处理好的发丝图层复制到蒙版中即可得到想要的发丝;更换背景不能直接更换背景色,需要做一些简单的处理,这样就可以非常完美的抠出发丝并加上任意背景色。
这种方法不用在通道操作,避免通道的很多局限及调选区的时候丢失发丝细节,同时精度超越之前的所有方法,只是耗费的时间稍多一点。
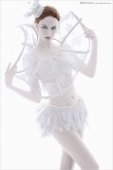
原图

<点小图查看大图>
最终效果

<点小图查看大图>

<点小图查看大图>
1、打开原图
素材,进入通道面板,可以对比一下红、绿、蓝通道,找出发丝与背景色差最大的通道。这里蓝通道非常理想。选择蓝色通道,按Ctrl + A 全选,按Ctrl + C 复制。点RGB通道返回图层面板。

<图1>
2、新建一个组,命名为“参考”,在组里新建一个图层,按Ctrl + V 把复制的通道粘贴进来,如下图。

<图2>
3、按Ctrl + J 把复制的通道图层复制一层,原图层隐藏,我们对副本进行操作,先按Ctrl + M 调整曲线,把暗部加深一点,参数及效果如下图。

<图3>

<图4>
4、创建曲线调整图层,把暗部提亮,参数及效果如下图。从效果可以看出现在发丝都非常明显,这样有利于我们后面的操作,这在通道中是不能实现的。

<图5>

<图6>
5、回到复制的通道副本图层,按Ctrl + M 调整曲线,把暗部稍微调暗一点,把发丝与背景色差加大,参数及效果如下图。

<图7>

<图8>
6、用套索工具把头部选取出来,按Ctrl + Shift + I 反选,用油漆桶工具填充黑色,如下图。这样抠出区域就缩小到头部,避免其它因素的影响。

<图9>
7、我们从头顶开始操作,这块是发丝中最难抠的一部分,学会后其它部分处理就非常简单了。先用套索工具把顶部的发丝选取出来(选取的时候尽量选背景与发丝色差不明显的区域),然后羽化5个像素。

<图10>

<图11>
8、按Ctrl + M 调整曲线,把暗部及高光对比加大,参数设置如图12,确定后取消选区,效果如图13。

<图12>

<图13>
9、选择钢笔工具,按顶部发丝边缘勾路径,如下图。

<图14>
10、按ctrl + 回车把路径转为选区,用油漆桶填充黑色,然后取消选区,如下图。

<图15>
11、现在来处理发丝中间部分。把顶部发丝局部放大,自己能看清楚为最佳。选择加深工具,曝光度设置为30%,然后调整笔刷大小在发丝缝隙中加深处理,把空隙涂暗。
<图16>

<图17>
12、可以用钢笔勾缝隙路径并填充黑色,也可以用加深工具慢慢加深处理,需要有点耐心。